Setting Up the .NET RESTful Engine
This article outlines the basic information and steps you need to install and test the Fluent .NET RESTful Engine.
Requirements
- Windows Server 2012 R2 or later, Windows 10 or later
- A virtual machine, cloud server, or dedicated hardward can be used
- Microsoft Internet Information Services (IIS)
- In Windows 10+, you must enable IIS
- For information on installing and configuring IIS in other versions, refer to the following Microsoft articles: Windows Server 2016; Windows Server 2012
- .NET Framework 4.8
- Hardware
- Processor: 2 GHz
- Memory (RAM): 4 GB
- Hard Disk: 300 MB free space
- A Report Engine for RESTful license key (request a trial license key if you don't have one)
For .NET RESTful Engine versions 21.1+ you will need to install the Microsoft Visual C++ Redistributable if you get the following error when initializing the RESTful Engine:
System.IO.FileNotFoundException: Could not load file or assembly 'PDFNet.dll' or one of its dependencies.
You can get the installer from here.
Installing the .NET RESTful Engine
Downloading the RESTful Engine
Go to Fluent Downloads and download the latest version of Report Engine for RESTful (RESTfulEngine.zip)
From RESTfulEngine.zip, extract the RESTfulEngine directory and its contents to C:\inetpub\wwwroot. Then you can rename the RESTfulEngine directory if you wish.
Setting it Up On IIS
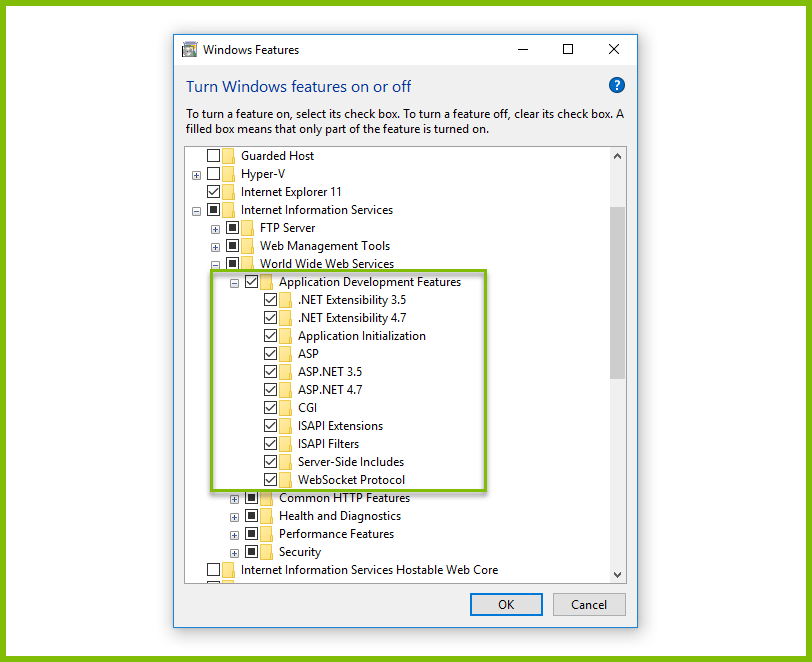
Click "Start button" or Cortana and enter "Turn windows features on or off"
In the new window, navigate to Internet Information Services > World Wide Web Services > Application Development Features
Check (enable) the features. You may not need CGI.
Click on OK to save your selections and exit.
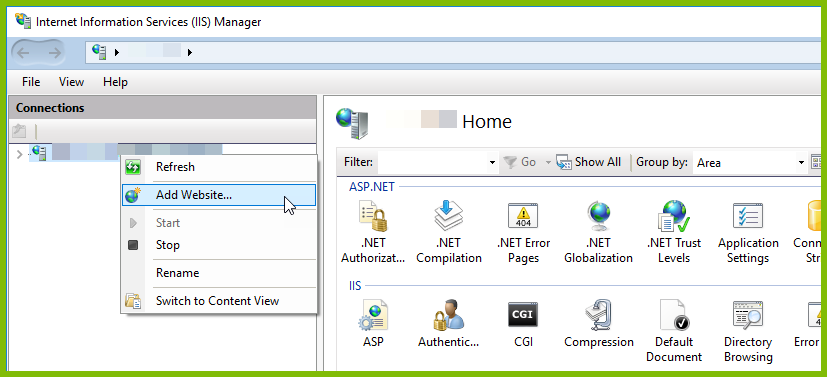
Open IIS Manager (search for "IIS" from your Start button or Cortana), then create a new website by right-clicking on the server (top level of the navigation tree) and choose "Add Web Site..." to bring up a new interface.
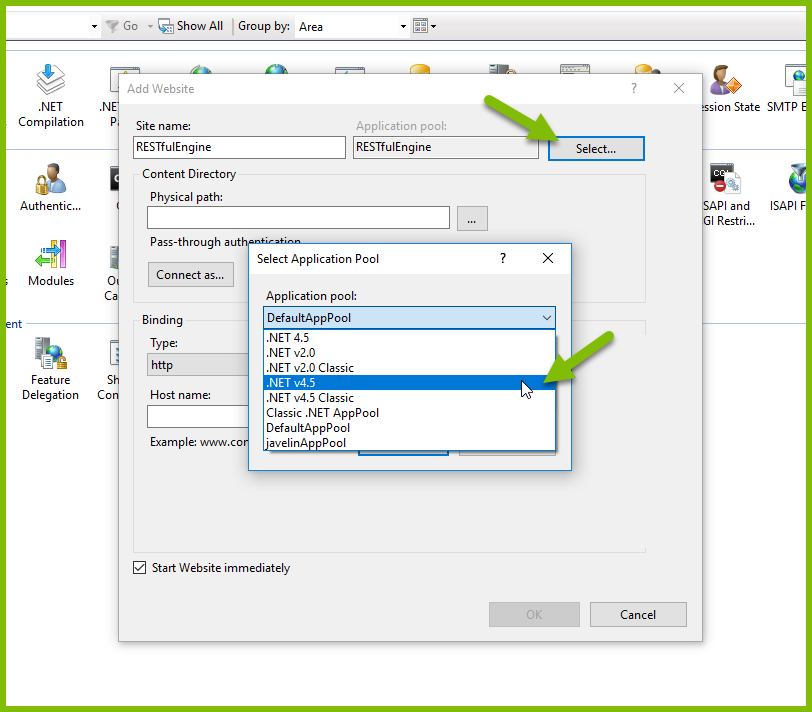
In the "Add Website" dialog, set a descriptive site name, but not the application pool.
Click on the "Select…" button next to the "Application pool" text field. Click on the drop down list and select one of the options:
- ASP.NET v4.0
- .NET 4.5 or .NET 4.0
(Although you may only see .NET 4.0 or .NET 4.5, if you have .NET 4.5.1 installed, either option will work.)
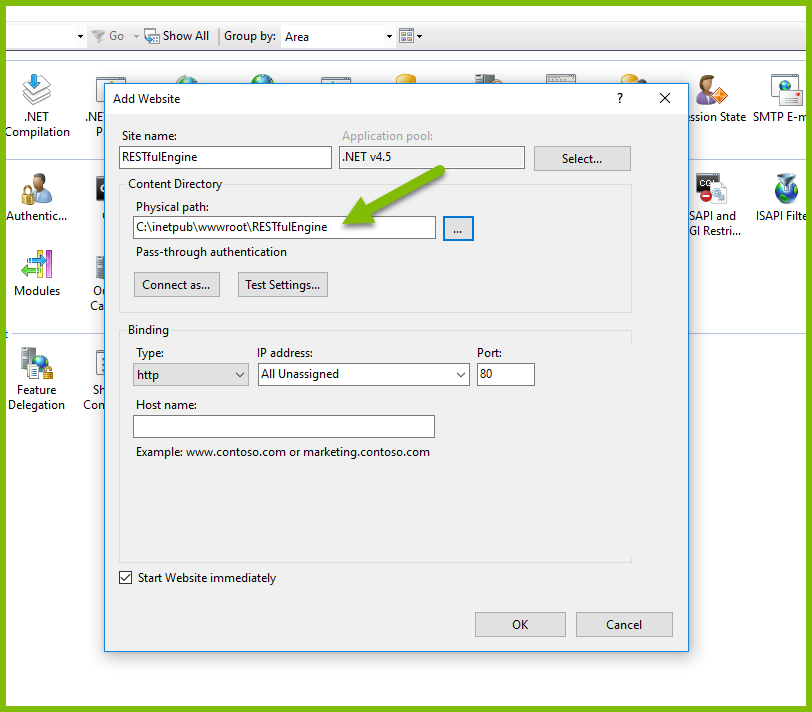
Now browse to the physical path to the RESTfulEngine folder (which you may have renamed) in C:\inetpub\wwwroot.
For the "Binding" section, select an IP address and port to be used for this website, and optionally a host name.
Then click on OK to close the "Add Website" dialog.
Back in the left pane of your IIS window, right-click on the RESTfulEngine application you created (in the navigation tree) and click "Edit Permissions... ." You must allow write permissions for the application.
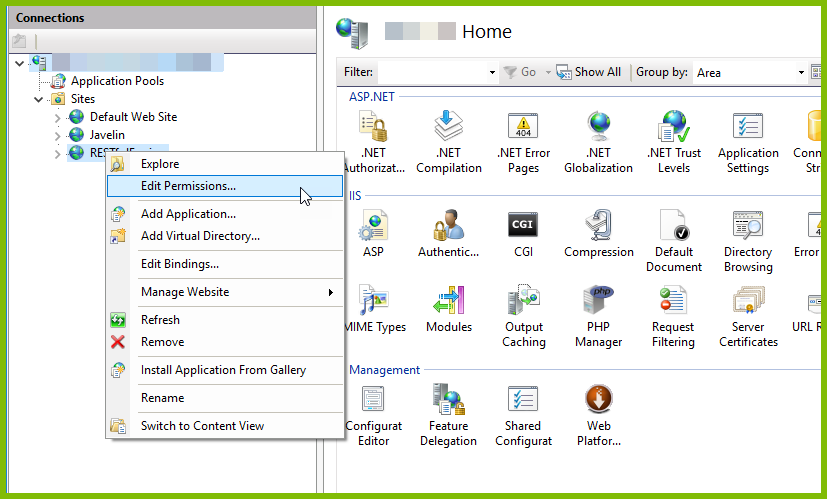
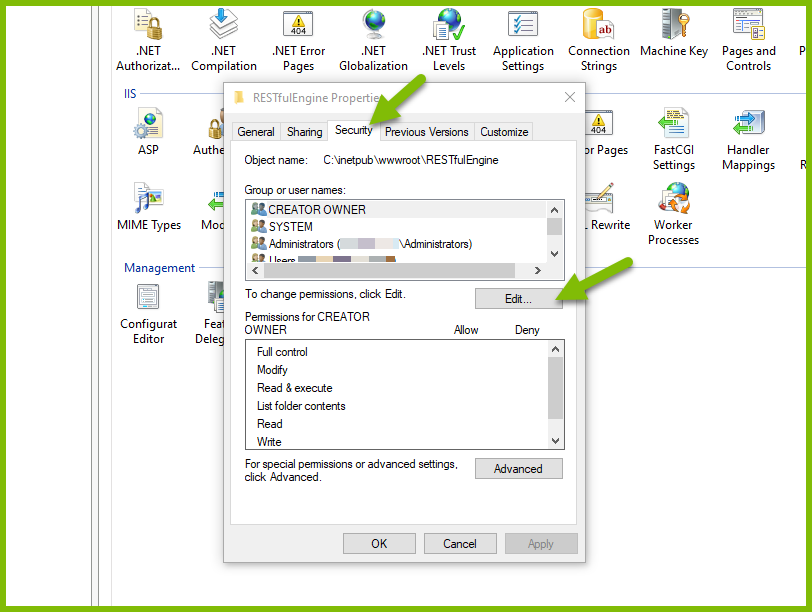
In the properties dialog, select the Security tab, then select CREATOR OWNER, and click on the "Edit..." button.
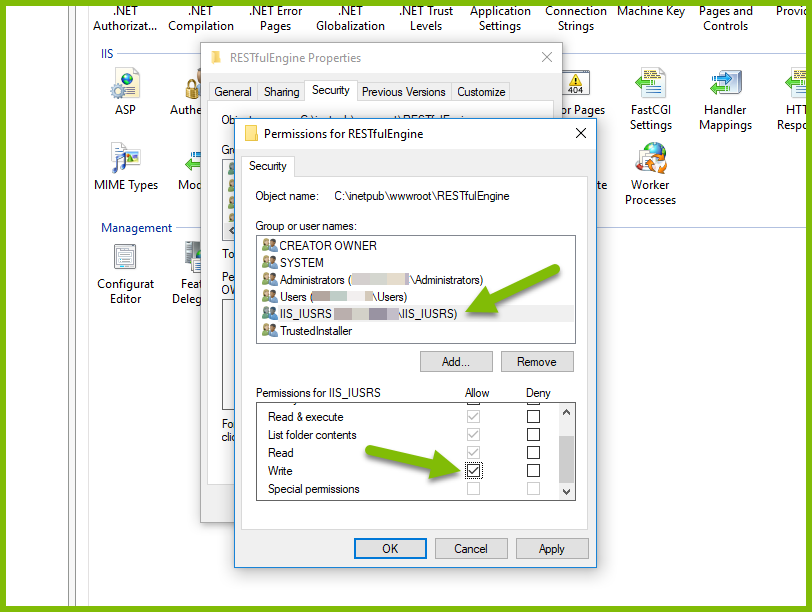
Select the "IIS_IUSRS" account, and under the "Allow" column, select the "Write" checkbox under the permissions for the IIS_IUSRS group. Click on OK to close the Permissions dialog. Then click OK to close the Properties dialog.
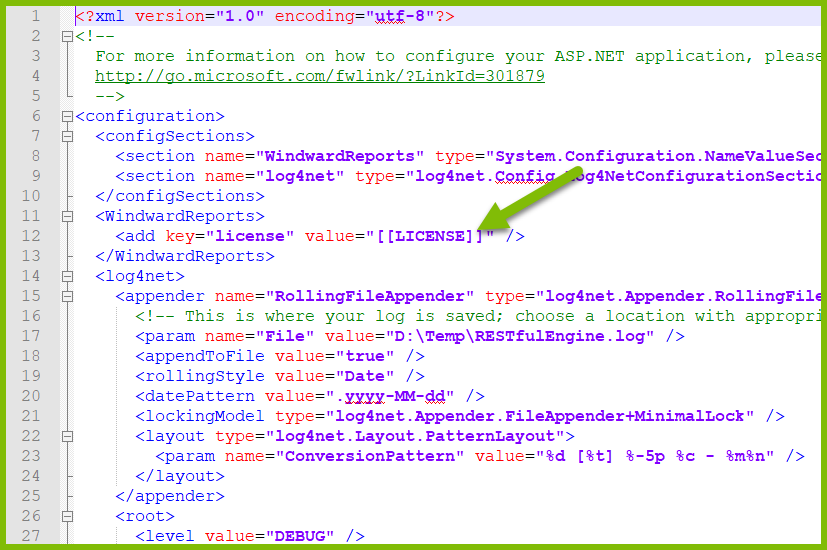
Entering Your License Key
The Report Engine for RESTful has a [web.config configuration file] which must be edited to insert your license key. Replace '
Testing the Installation
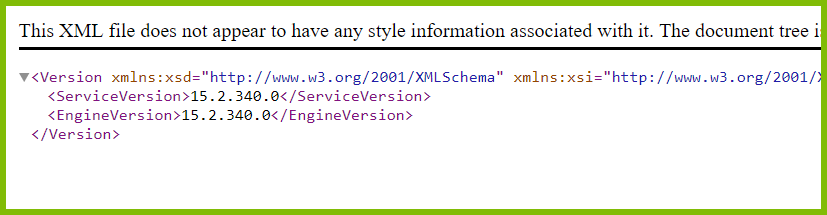
To test your installation, open a browser and type the URL:
http://{site name}:{port number}/v2/version
where {site name} is the site name you set when you created the website above, and {port number} is the port number you selected. You should see version information displayed for your Engine:
Next Steps
(Will need to fill this out with links to other doco once theyre up)